


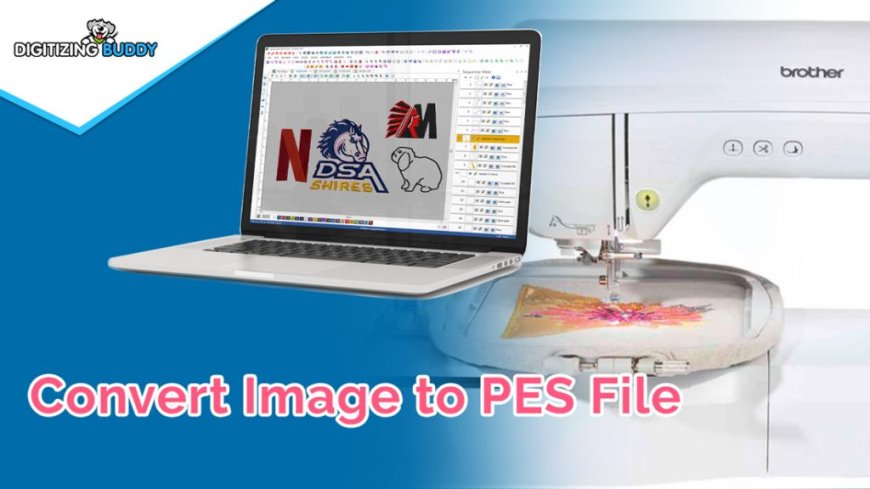
Turn Your Design into Thread Digitizing Images for Brother Embroidery
Digitizing for Brother embroidery machines isn’t about being perfect on the first try—it’s about learning as you go.
Ever looked at a cool design and thought, I wish I could stitch that onto a hat or jacket?With a Brother embroidery machine and a little know-how, you can. Digitizing images for Brother embroidery might seem intimidating at first, but once you get the hang of it, youll be turning any graphic into stitch-ready art in no time.
Why Digitizing Matters for Brother Machines
Brother embroidery machines are popular for their reliability and user-friendly features, but they still need the right kind of file to work their magic. Unlike printing, where you can just send an image to the printer, embroidery machines need a special file that tells them exactly where to move the needle, when to change thread, and how to fill in shapes.
A poorly digitized file can lead to:
- Thread breaks and jams Frustrating mid-project stops.
- Puckered or distorted designs When stitches pull too tight on the fabric.
- Blurry or patchy details Tiny text or intricate lines that dont stitch cleanly.
The good news? With the right approach, you can avoid these headaches and create professional-looking embroidery every time.
Step 1: Choosing the Right Design
Not every image is embroidery-friendly. The best designs for digitizing have:
- Clear, bold lines Thin, delicate details might get lost in stitching.
- Limited colors More colors mean more thread changes, which can slow things down.
- Good contrast Soft gradients or light-on-light designs dont always translate well.
If your design has tiny text, super-fine details, or lots of shading, you might need to simplify it before digitizing.
Step 2: Picking Your Software
Brother machines read specific file formats like .PES, .DST, or .EXP. To create these files, youll need digitizing software. Here are some options:
- Brothers PE-Design Made specifically for Brother machines, great for beginners.
- Hatch Embroidery A step up with more advanced tools but still user-friendly.
- Ink/Stitch A free, open-source option if youre on a budget (but requires more manual tweaking).
Auto-digitizing tools (where the software converts an image for you) can be tempting, but they often produce clunky results. For the best quality, youll want to manually adjust stitch types, directions, and densities.
Step 3: Understanding Stitch Types
Embroidery isnt just one kind of stitchits a mix of techniques that create different effects. The main ones youll use are:
- Running Stitch A basic straight stitch, perfect for outlines and fine details.
- Satin Stitch Tight, shiny stitches that work great for text and borders.
- Fill Stitch A pattern (like zigzag or crosshatch) that covers large areas smoothly.
Choosing the right stitch type makes a huge difference. For example, satin stitches give a polished look to letters, but using them on big areas can waste thread and cause fabric to pucker.
Step 4: Setting Stitch Direction and Density
How stitches lay affects the final look. If all your stitches go the same direction, the design can look flat or distorted. Changing angleslike having vertical stitches in one section and horizontal in anotheradds dimension.
Stitch density (how close together stitches are) also matters:
- Too dense The fabric gets stiff, and the design may pucker.
- Too loose The fabric shows through, making the design look patchy.
A good rule? Thicker fabrics (like denim or canvas) handle denser stitches, while stretchy or thin materials (like t-shirts) need lighter stitching.
Step 5: Dont Skip the Underlay
Underlay stitches are like the foundation of a housethey stabilize the fabric before the main stitching begins. Skipping them can lead to shifting, warping, or an uneven finish. Common underlay types include:
- Center Run A single line of stitching down the middle of a shape.
- Edge Run Outlines the design to keep edges crisp.
- Zigzag Underlay Creates a mesh-like base for fill stitches.
The right underlay depends on the fabric and design, but its almost always worth the extra step.
Step 6: Testing and Refining
Even pros test their designs before stitching the final piece. Hoop up some scrap fabric and run a test to check for:
- Thread tension issues Loopy stitches or breaks.
- Puckering Fabric pulling too tight.
- Misaligned elements Parts of the design not lining up right.
If somethings off, go back to the software and tweak stitch density, underlay, or pathing.
Common Mistakes (and How to Avoid Them)
1. Ignoring Fabric Type
A design stitched on thick twill will behave differently than on stretchy knit. Always adjust settings based on your material.
2. Overloading Small Details
Tiny text or intricate lines might look great on screen but turn into a tangled mess when stitched. Simplify where neededsometimes less detail actually looks better.
3. Poor Stitch Order
If the machine jumps all over the place between sections, it wastes time and thread. Arrange the stitching path logicallylike coloring in a book, work from one area to the next.
4. Forgetting About Pull Compensation
Embroidery machines tug on fabric as they stitch, which can slightly distort shapes. Compensate by making designs a tiny bit wider or taller than the original.
Pro Tips for Better Brother Embroidery
- Start with simple designs Master basics before tackling complex artwork.
- Use high-quality thread Cheap thread breaks more and dulls your design.
- Keep your machine maintained Clean lint, change needles regularly, and check tension.
- Learn from existing files Open professional embroidery files in your software to see how theyre built.
Final Thoughts
Digitizing for Brother embroidery machines isnt about being perfect on the first tryits about learning as you go. The more you practice, the more youll understand how stitches interact with fabric, how to tweak settings, and how to turn any image into a stunning embroidered piece.
So dust off that Brother machine, fire up your software, and start stitching. Before long, youll be turning digital designs into wearable (or giftable) works of art!